
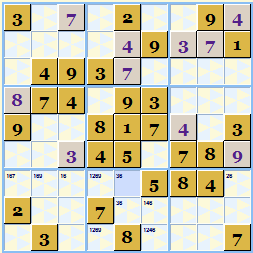
Sudoku Help - Grid Display
Sudoku Dragon shows the Sudoku grid made up of individual squares. You can re-size the grid and all the squares by dragging the bottom-leftmost corner of the window or you can make the grid occupy the full screen by double clicking on the title bar. The program will remember the position and size for the next time you use Sudoku Dragon. The size of the side panel to the right of the grid can be changed by dragging the bar located on its left edge, if you re-size the whole window the side panel size is automatically adjusted so that the grid is as large as possible.
Allocating a square
To allocate a square you can use either the keyboard or the mouse to select a square. When the square is highlighted just use the appropriate key '0' through '9' (or letters if you chosen this option) to allocate it to a square. If Num Lock is enabled you can use the number keypad to do this. If you chosen a grid size more than 9 or have chosen to use letters you will need to press the corresponding letter key 'A' thru 'T'. You can also allocate a value by selecting an already allocated square with the mouse and dragging it to the destination square and then release the mouse button.
Navigating with the mouse
Click the left mouse button on the square you want to allocate. The right mouse button will show a set of commands available for that particular square. Double clicking with the left mouse button gives Details for the square. You can select multiple squares by left clicking on each one with the CTRL key pressed. You can then allocate or set possibilities for all the selected squares at the same time. You can also select multiple squares by clicking and then dragging the mouse to another square then relaeasing the mouse - all squares in between will be selected,
Navigating with the keyboard
First use the TAB key to make sure the grid has input focus (this is indicated by a large flashing underline in the current square) you can then use the keyboard navigation keys to move around the Sudoku grid (up, down, left, right arrow keys). The page up/down keys will move by a region, if you use CTRL key at the same time this will move horizontally rather than vertically. You can use Home to get to the top-left square and End for bottom-right square. If Scroll Lock is off the arrow keys will wrap around to the 'other' side of the grid.
Correcting a mistake
If you make a mistake, allocating the wrong square or choosing the wrong number you can correct it in several ways. The easiest is to use Edit | Undo to take back the most recent changes. You can go back any number of steps using Undo. Alternatively you can press the Delete or Space key to clear the allocation in the selected square. If you have an alternative allocation just make it by overwriting the current allocation. The program will stop you making an incorrect allocation by showing a warning message.
Using the mouse wheel
If your computer's mouse has a 'wheel' in the middle you can use this to assign a number to a square. First click on the grid square you want to change. Then move the mouse wheel, all the available numbers will be displayed in turn. When the number you want to assign is displayed click with the left mouse button on the same square to make the assignment. To cancel the assignment click with the mouse anywhere else on the grid. If you use the mouse wheel then you do not need to use the keyboard at all in order to play Sudoku.
Changing the view
The grid uses a range of colors to give information about a Sudoku square. The currently selected square is highlighted and the currently selected possibility in the possibility bar causes all squares allocated to this symbol to be highlighted. The last allocated square is given a highlight as it often useful to look through new solution possibilities opened up after making an allocation. All the grid colors and text fonts can be changed use the Appearance tab in the View | Options menu or the toolbar.
Tentative Possibilities
If you want to enter your own possibilities for squares you can do this simply by pressing the SHIFT key at the same time as pressing a number (or letter). So SHIFT+8 will set 8 as a possibility for the current square. To clear all marked possibilities for the current square use F7 or the Edit | Clear all Possibilities menu command. Possibilities are only displayed on unallocated squares. You can also mark a number as 'impossible' in this case just press CTRL with the appropriate number. There is an advanced user setting that automatically takes out your own possibilities from those deduced automatically, so you can easily track which possibilities have been tried and which ones remain.
Annotations
You can add your own notes to individual squares. To annotate a square double click on it or press the Return or Enter key or use Details from the Game menu. Any square with notes is indicated by a star mark and if you let the mouse cursor linger over the star the note will be displayed as a tip window. An allocated annotated square is indicated in the allocation list by a star marker.
Coloring
For really tough puzzles you may want to clearly mark squares to remind yourself what you have already considered or need to consider later. This is particularly useful in the alternate pair strategy. There are six different colors to choose from and the coloring can be undone and redone just like square allocations. They are available from Edit menu under Color heading. It is also available from the Right click menu when you click the mouse on a square in the grid and as a keyboard option (SHIFT+F1 to SHIFT+F6 and also 'Q W E R T Y' keys for colors 1 to 6 respectively). When you have finished analyzing the squares you can clear all the colored squares in one go by choosing the Clear all coloring menu option
Side Panel
To the right of the grid is an area that can optionally display additional information. It has a tabbed window at the top. If the side panel is not currently open it will show just an arrow. To open the side panel you can click on the arrow.
The side panel may display three different types of information:
1. Grid allocation list
As you play Sudoku all the square allocations, possibility and color settings are remembered with the puzzle and displayed in a list on the right hand side panel. To review the allocations you can click on an entry, the allocated square will be highlighted. If you'd prefer to work blind, without the allocation list you can choose to switch it off using the View | No side panel menu command or click on the close button on the tab above the window.
2. Square Possibility list
Lists what possible numbers can go in the currently selected square. For full description see Grid Possibilities.
3. Square Notes
Your notes and possibilities for the currently selected square. For full description see Grid Square Details .
You can switch to a different side panel window using the menu: select the option you want from the View menu or use the keyboard: F3 for Allocation List; F11 for Possibilities and F5 for Notes or click on the tab control at the top of the side panel. You can also use CTRL+TAB to swtch between the different panels.
- The Sudoku Grid
- Display Themes
- Alert messages
- Details for each square
- Possible square allocations
- Square allocation details
- Save as screenshot
Copyright © 2005-2025 Sudoku Dragon